Upgrading Normcore
Normal follows strict versioning and support policies to ensure developers can upgrade with confidence:
-
Semantic Versioning: Normcore strictly follows Semantic Versioning 2.0.0:
- Patch versions (2.0.0 → 2.0.1) contain bug fixes only
- Minor versions (2.0.0 → 2.1.0) add new features while maintaining backward compatibility
- Major versions (2.0.0 → 3.0.0) contain breaking API changes or network protocol incompatibilities
-
Long-term Support: All versions starting with Normcore 2.0.0 (released October 2020) will be supported indefinitely, even as newer versions are released.
Upgrading to Normcore 3
Normcore 3 maintains full API compatibility with Normcore 2. To upgrade, simply update the UPM package to Normcore 3 and rebuild your project. No code changes are required.
Network Compatibility: Normcore 2 and Normcore 3 clients cannot connect to the same room. Once a client connects to a room, only clients with the same major version can join.
If upgrading a live production game, either require all users to update before connecting, or separate users by version by appending a suffix to room names (e.g., -normcore3).
Upgrading to Normcore 2
Normcore 1 servers were disabled in June 2021. Normcore 2 servers will continue to be supported indefinitely, even as new versions are released.
Normcore 2 provides significant improvements to transform syncing, voice chat, and overall latency. The upgrade is designed to be straightforward and requires no code changes for most projects.
Prerequisites:
- Unity 2019.1 or later
- Project must compile without errors
- Create a backup of your project before proceeding
1. Import Normcore 2
Download the latest Normcore 2 unitypackage and import it into Unity. Do not delete Normcore 1 files before this step, as this will cause compilation errors.
Once imported, Normcore 2 will register itself as a package in the Unity Package Manager. You will see GUID conflicts and duplicate symbol errors—this is expected behavior while both versions coexist in your project.
2. Delete Normcore 1
In order to delete Normcore 1 from your project, open up the Normal folder and delete the Realtime folder. You can leave all other folders alone.
3. Restart Unity and Perform Migration
Restart Unity to reset any files altered during the import process. When Unity reopens, the Normcore Migration window will appear.
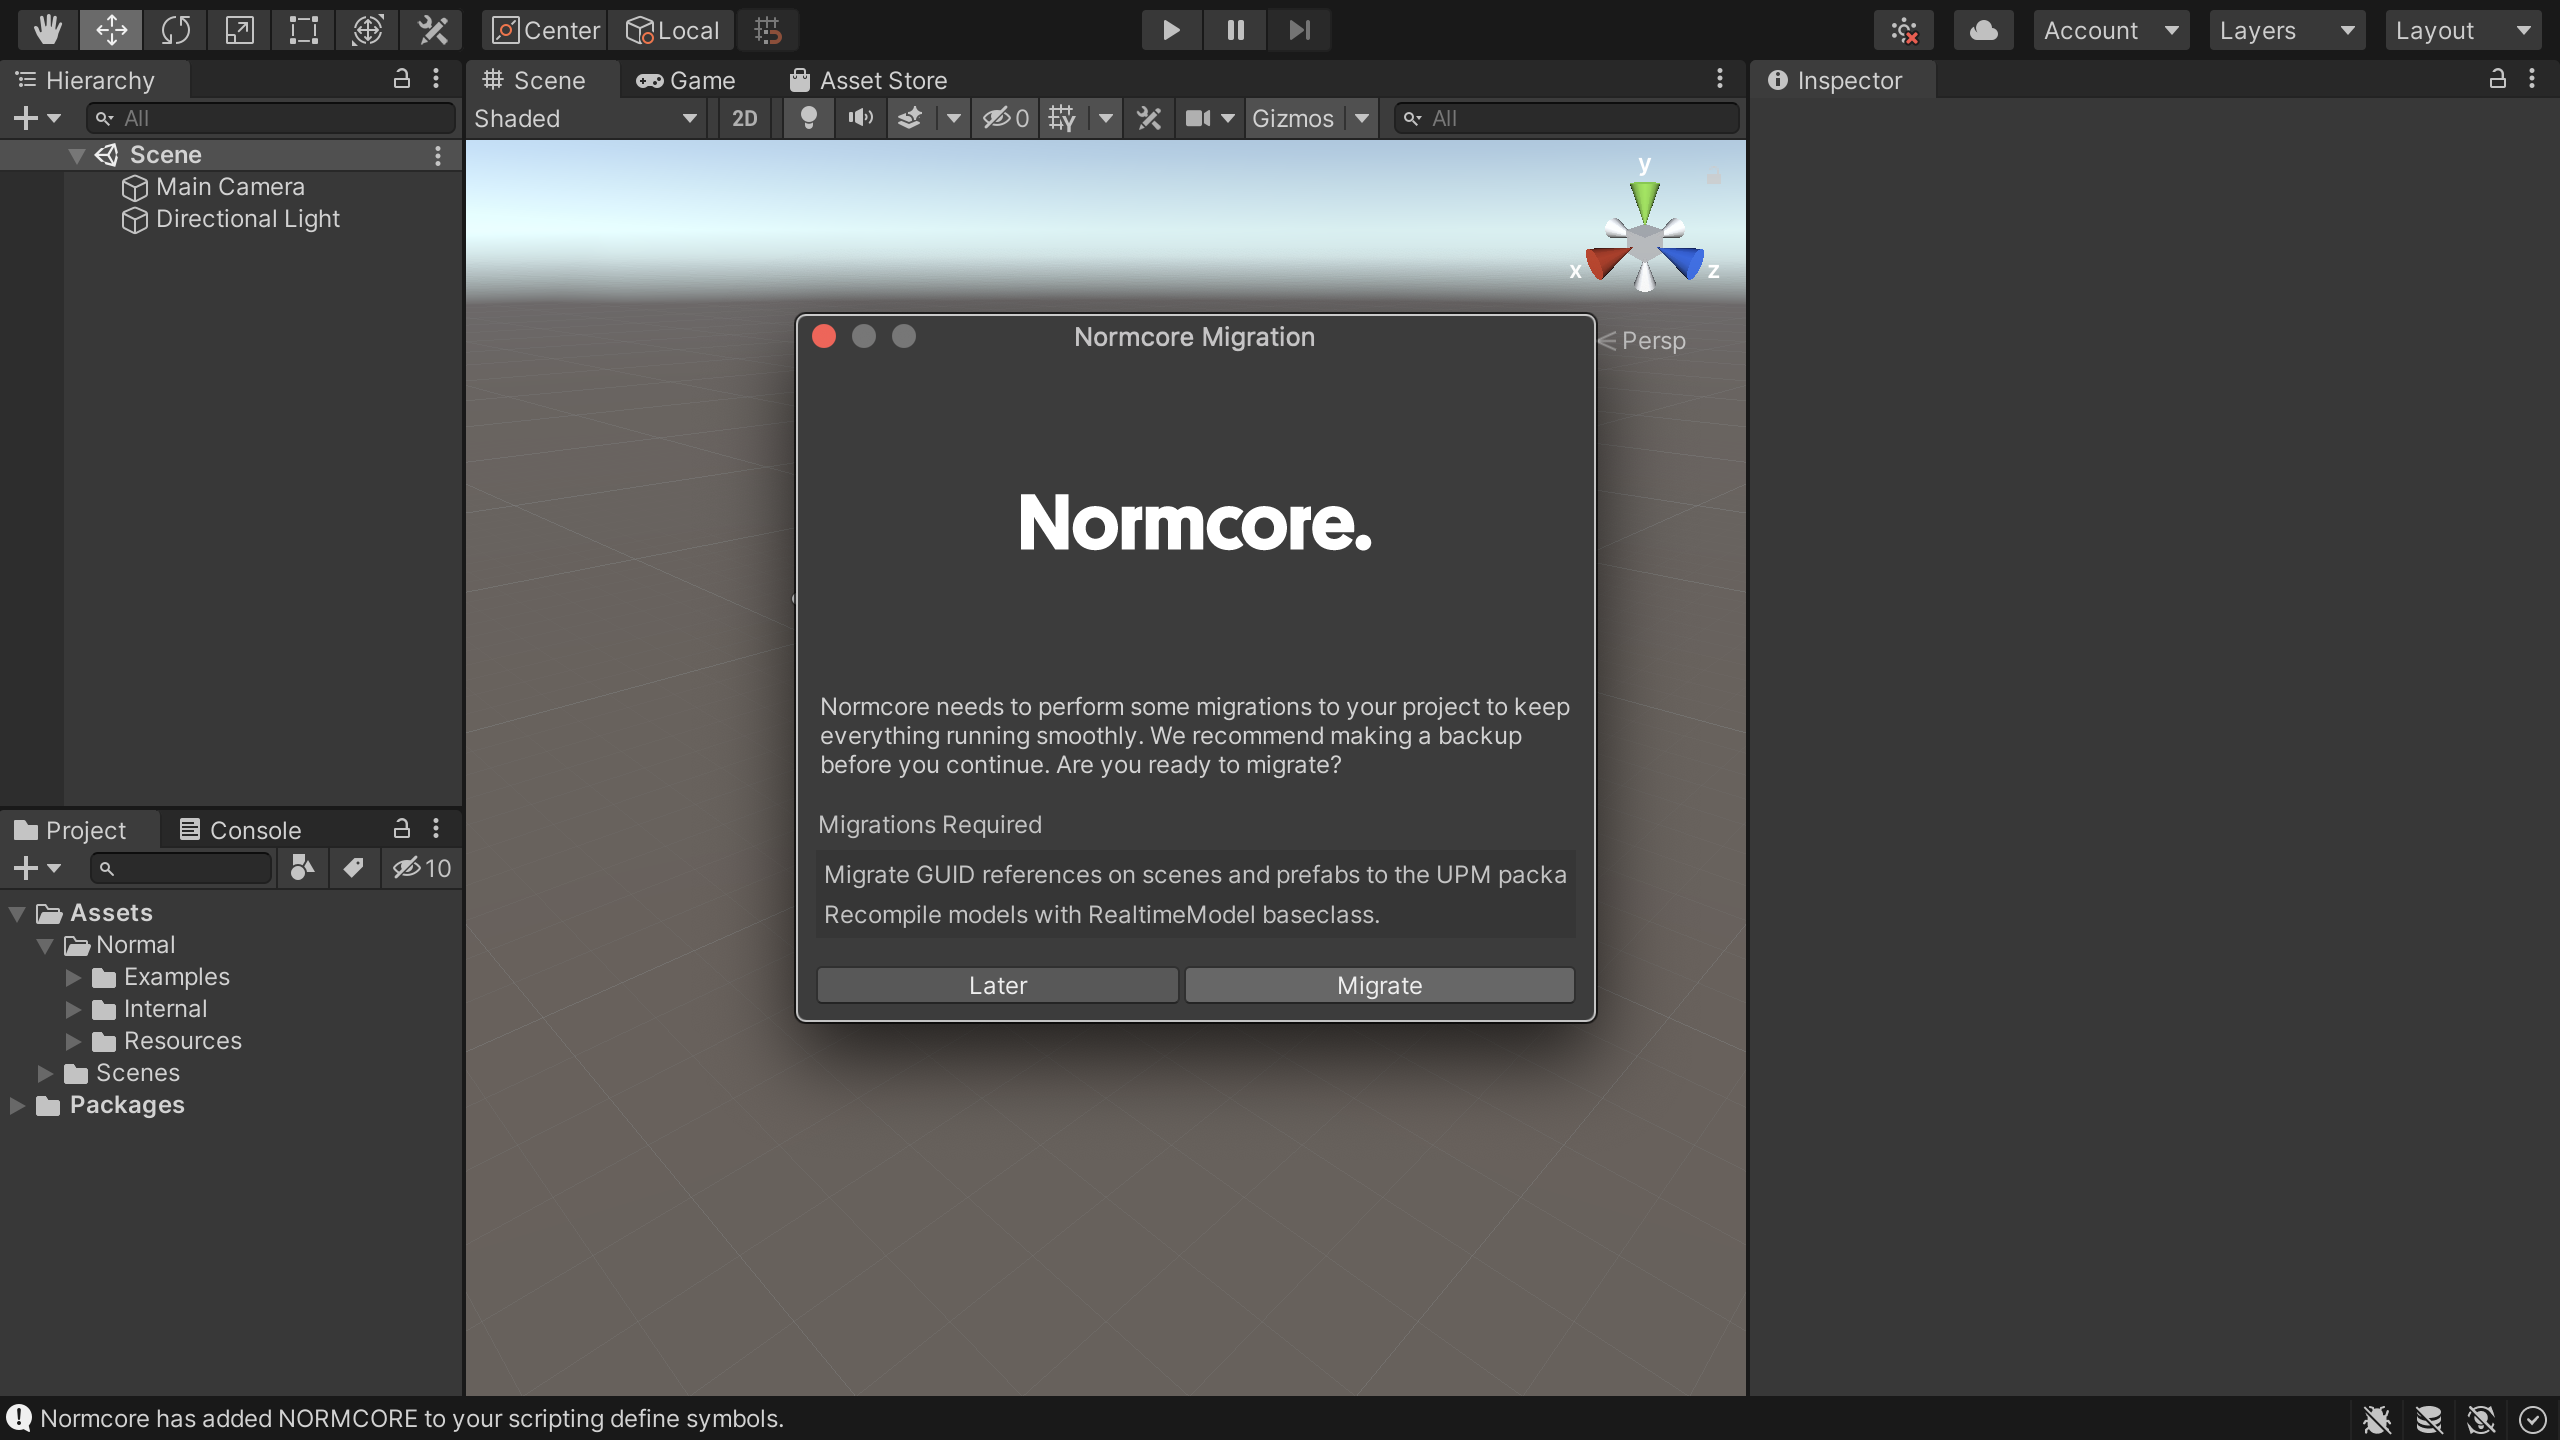
Click the Migrate button to update component references and recompile all RealtimeModels to use the new RealtimeModel base class.
Done!
Your project should now compile without errors and is ready to use with Normcore 2!
If you encounter any issues during the upgrade process, reach out on our Discord and we'll help you out!